

Drupal Development made easier with Qt Assistant - Part 2
In the previous part of this walk-through, we installed the necessary software to get our Drupal API documentation in Qt Assistant. The next step is to actually generate the documentation so we can browse through it, search it and more. If you haven't done so already, read part 1 so you're sure to have the right software.
Creating a Doxyfile
The first thing we need to do is creating a configuration file for Doxygen. This will contain instructions for Doxygen about the formats you want the documentation to be in, where to get the documentation from, etc. I'll show the settings in the graphical tool, doxywizard. Of course it's also possible to let the doxygen command generate the file for you so you can edit it manually (with a text editor). Either way is fine. If you want to use the Doxyfile generated through this tutorial straight away, scroll to the bottom of this post to download it.
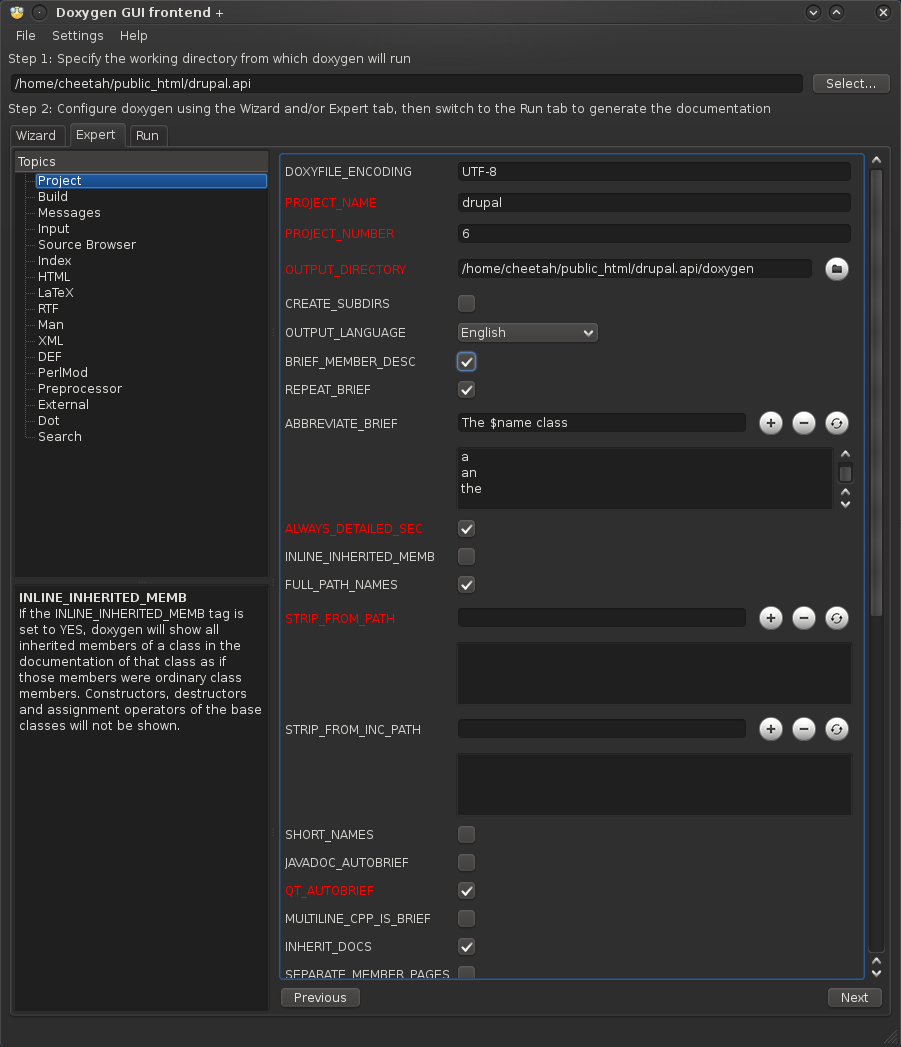
So, let's start the Doxygen wizard. You should find this in your launcher menu, probably under the Development submenu, or you can just run doxywizard from a terminal. The window you get presented asks you, as a first step, to select the working directory. Point this to your Drupal directory. For me this would be /home/cheetah/public_html/drupal.api. Now, as we want to set some advanced settings, we skip straight to the Expert tab to configure everything.
The first things to pay attention for are the PROJECT_NAME ("drupal"), PROJECT_NUMBER ("6" or whichever Drupal version you're working with), and the OUTPUT_DIRECTORY settings. For the last setting, creating a new place for Doxygen to dump its files in is the easiest way to prevent the Doxygen output from cluttering your Drupal installation. I've put it in a doxygen subdirectory ("/home/cheetah/public_html/drupal.api/doxygen"). You'll probably also want to enable the REPEAT_BRIEF and ALWAYS_DETAILED_SEC as well. The STRIP_FROM_PATH setting should be empty, but it also doesn't hurt to enter the base directory of your Drupal installation (this way, if your run Doxygen outside the Drupal directory, it'll still properly strip the path from the filenames). I've also enabled the QT_AUTOBRIEF and OPTIMIZE_OUTPUT_FOR_C options.
There's a final important setting on the Project topic, which is the EXTENSION_MAPPING. Generally, Drupal uses *.php, *.module and *.inc filenames for code. However, we need to tell Doxygen that these are PHP files. Add "module=PHP" and "install=PHP" (according to the documentation, you should omit the "." in front of the extension).
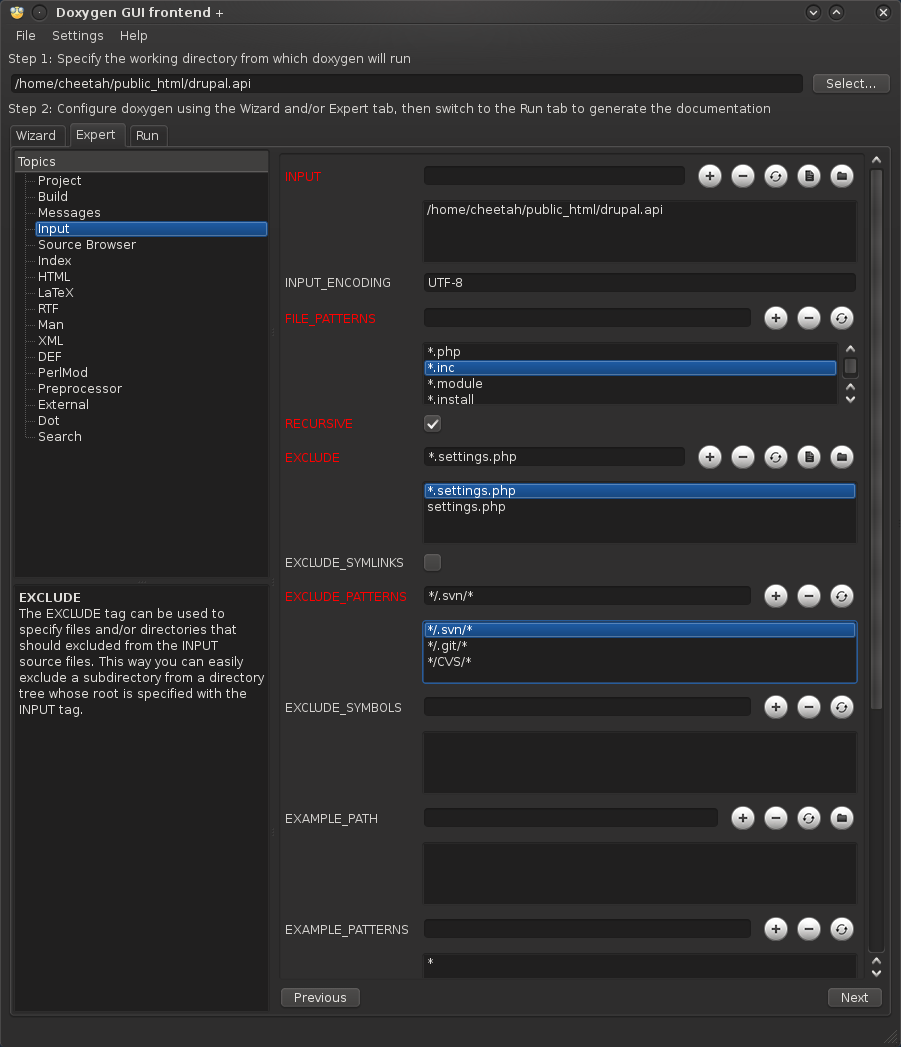
Next tab is the Build topic. We want to get all the documentation, so we extract ALL, PRIVATE, STATIC, LOCAL_CLASSES and LOCAL_METHODS. The SHOW_DIRECTORIES setting may be useful to have the directory structure visible in the documentation. We skip straight to the Input topic, and add our Drupal directory as INPUT setting. Important is the FILE_PATTERNS setting: this tells Doxygen which files contain documentation. The *.php and *.inc should normally already be in there, but for Drupal add the *.module and *.install patterns as well. This way Doxygen should extract documentation from most if not all of the code files in Drupal (unfortunately Doxygen doesn't work well with Javascript).
Also enable the RECURSIVE option, otherwise you'll need to tell Doxygen explicitly which directories it should look in for documentation, in the INPUT setting. If you keep a directory with backups of old modules within the Drupal directory, enter its path in the EXCLUDE setting (e.g. "backup"). As EXCLUDE_PATTERNS some useful entries may be */CVS/*, */.svn/*, */.git/* (so Doxygen skips version-controlled directories), plus */settings.php and */*.settings.php to ignore site-specific settings files.
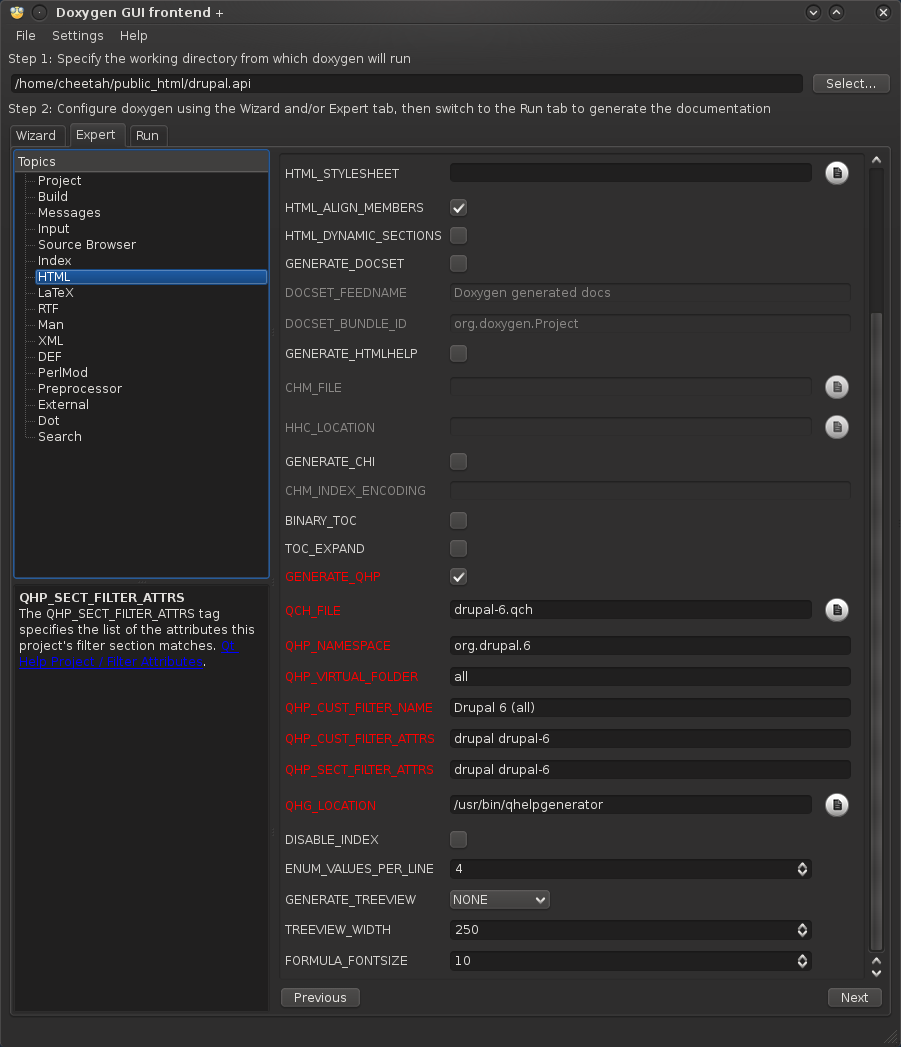
Next up is the HTML topic, in which we configure the HTML output Doxygen generates. Yes, we want to generate HTML (switch on GENERATE_HTML) in the html subdirectory (HTML_OUTPUT) with the .html extension for the files (HTML_FILE_EXTENSION). Now a very important setting to generate the Qt Help files, which Qt Assistant uses. Switch on GENERATE_QHP. For QCH_FILE, which just became enabled, set drupal-6.qch (or just drupal.qch, or replace the 6 with the version of Drupal you're working with). Set the QHP_NAMESPACE to org.drupal.6 (again, replace the version number). Set all as the QHP_VIRTUAL_FOLDER - this will come in handy later. Also set the filter settings: QHP_CUST_FILTER_NAME to "Drupal 6 (all)", and set both QHP_CUST_FILTER_ATTRS and QHP_SECT_FILTER_ATTRS to drupal drupal-6. Finally, we set the path to the "qhelpgenerator" program ("qhelpgenerator.exe" on Windows, I assume) in the QHG_LOCATION setting. This is probably something like "/usr/bin/qhelpgenerator" or "C:/Qt/bin/qhelpgenerator.exe". Leave the other settings at their defaults (DISABLE_INDEX off, GENERATE_TREEVIEW to none, etc.).
Finally, head to the LaTeX, RTF, Man and XML topics, and turn output for each of these off. We won't be using these. Finally, if you want to, enable or disable class diagrams on the Dot topic. This will make a difference for some contributed modules (mostly Views).
First Run
We're all set now, so let's run Doxygen! Go to the Run tab, click the Run doxygen button and let it do its work. When it's done (don't close the Doxygen Wizard until I tell you to!), click "Show HTML Output" and your browser will start with the Drupal documentation right at your hands. Unless you excluded the "sites" subdirectory, you also get all the documentation of contributed modules as well. You may notice some problems with broken links (e.g. the Form API reference etc), and the documentation is a little bit messy if you have many contributed modules. We'll solve these problems in the next part. First, let's exit the wizard. It will ask us to save the configuration. Save it under its default name (that would be "/home/cheetah/public_html/drupal.api/doxygen/Doxyfile" in my case). You'll find the sample file created in this tutorial at the bottom of this post.

Last step for today is loading up the Qt Assistant with our documentation. This will require using a terminal/command line. First make sure you know where Qt Assistant is located. The program is called just assistant, so for most platforms you should be able to find it using which assistant on the terminal. On Windows, look in your Qt installation path, in the bin directory. Now decide for a location for your Qt Help Collection file. Create an empty file with any name you like (e.g. drupal-6.qhc). You can use the touch command to do so, or by creating an empty file in that directory using your file manager (that would be the way to go for Windows users; use Explorer or Notepad and create the empty file. Make sure the extension is .qhc and not .txt or something else!). Now, assuming you've chosen the filename to be drupal-6.qhc in your home directory (and your username is cheetah) enter in a terminal:
/usr/bin/assistant -collectionFile /home/cheetah/drupal-6.qhc
You can also just set up a shortcut to do this, of course. You should see an empty Qt Assistant:
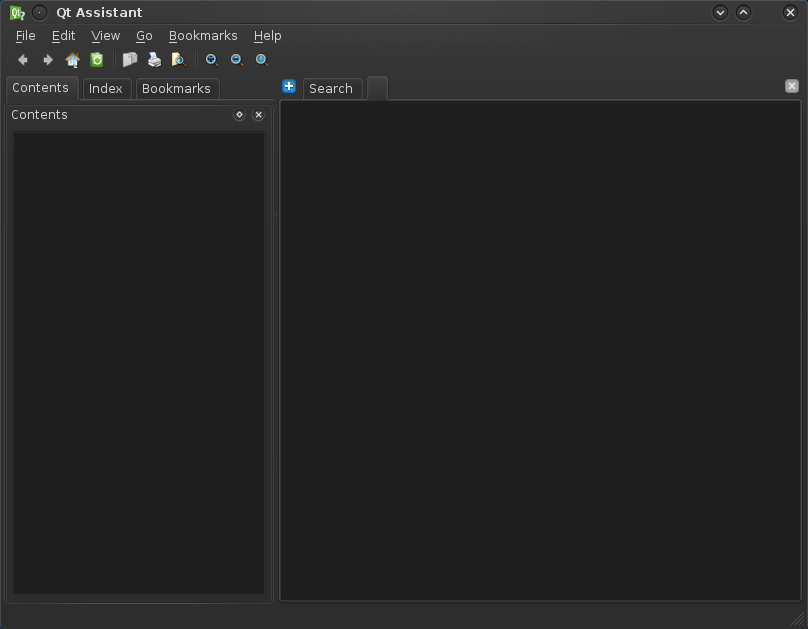
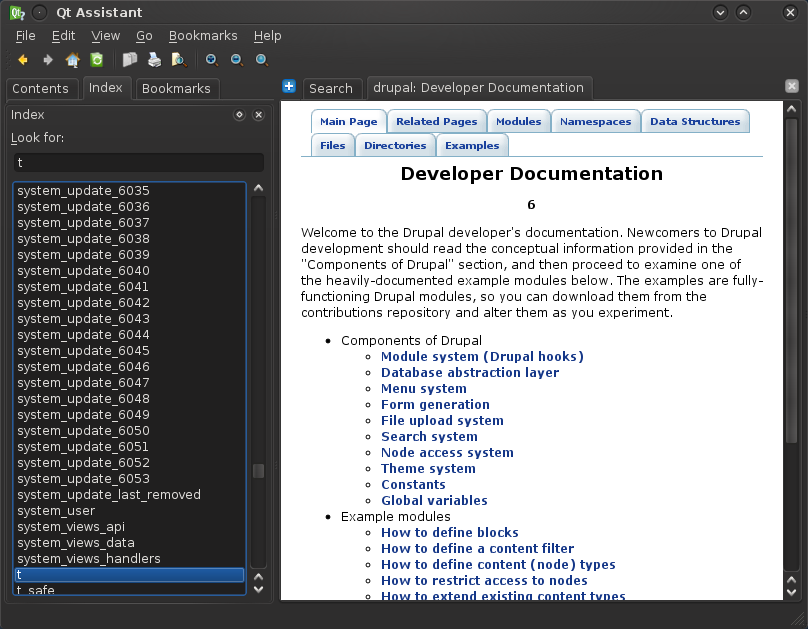
As long as this is the first time you're starting up the assistant with this file, you can head to the Edit > Preferences menu. Go to the Documentation tab, click Add... and add the drupal-6.qch file created by Doxygen (this will be in the doxygen/html directory within your Drupal installation, if you followed this tutorial). Qt Assistant will start updating its indexes, and you get to see and search your documentation:
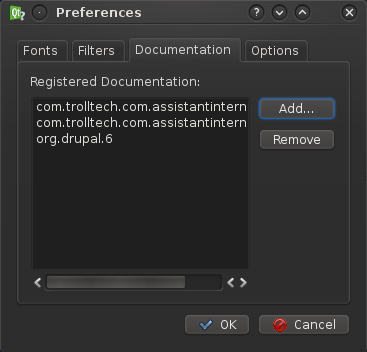
You'll find out that once you restart the assistant with the same collectionFile parameter, the Documentation tab will disappear from the preferences, even after removing and recreating the file. If this happened, you can still register and unregister help files from the collection file, from the command line as follows (change the filenames etc. of course):
assistant -collectionFile drupal-6.qhc -register /home/cheetah/public_html/drupal.api/doxygen/html/drupal-6.qch
To remove the help file from the collection again:
assistant -collectionFile drupal-6.qhc -unregister /home/cheetah/public_html/drupal.api/doxygen/html/drupal-6.qch
These commands will tell you if something useful happened, but won't actually start the assistant. Restart the assistant with just the collectionFile parameter again to just see the documentation.
Note that as long as the Qt Compressed Help file (the one generated by Doxygen) stays in the same place, you should be able to update it and see the changes in the assistant if you ever recreate the documentation. The assistant will automatically recreate its index and take care of such updates for you. Knowing that, you can create an icon that fires up the assistant for you, with the Drupal help loaded, so you can get that quick documentation access. Just use the above command above the empty assistant screenshot. Make sure you do give the proper path to the collection file!
Updates
If you ever want to update the documentation (for example because you added more contributed modules, updated Drupal to a newer version, etc), regenerate it with Doxygen. You can use the wizard to open the Doxyfile you saved, rerun Doxygen and the assistant should show the updated documentation after you start it again. It's as simple as that. Alternatively, using a terminal, head to your Drupal directory (or wherever you stored the Doxyfile) and simply call doxygen. As long as you've explicitly set the INPUT setting above, then run doxygen /path/to/Doxyfile and so you can even use a different filename for your Doxygen configuration. Of course you can also play with the various Doxygen settings, rerun doxygen, and you'll also get the documentation with the new settings in Qt Assistant.
Of course you don't have to use a separate collection file (*.qhc) for each version of Drupal you have. You can put each version of Drupal in the same assistant. Now if you made sure you have different namespaces (hence we placed the version numbers in the configuration), you should be able to filter per version at the top of the UI.
Summary
Last time all we did was install the necessary software. This time we actually used it all in the most basic way, with success: the Qt Assistant now displays the Drupal documentation. This should be enough to get you started finding all the information of the Drupal API that you need. There are still some problems with broken links to special topics, there's no way to filter out specific module information, and so on.
With the major steps taken, next time I'll dig a little deeper in fixing the most painful problems. It probably won't be as much work as this part. See you next time!
Other posts in this series:
| Attachment | Size |
|---|---|
| Doxyfile. | 62.83 KB |
Recent comments
14 years 5 weeks ago
14 years 5 weeks ago
14 years 6 weeks ago
14 years 21 weeks ago
14 years 21 weeks ago
14 years 21 weeks ago
14 years 25 weeks ago
14 years 26 weeks ago
14 years 26 weeks ago
14 years 26 weeks ago